Wednesday, June 06, 2012
DIY Ninjago Piñata: the finer and fun details
It's been a CRAZY two-week leading up to Kai's 6yo birthday party, which happened over the last weekend. I only had time at night (late, late at night) after the boys sleep to work on the piñata and other party essentials, so I was super sleep deprived by party time. I didn't have time to capture every single step on camera but what I have here should be enough if you intend to embark on this DIY Ninjago piñata adventure.
(This entry is about painting and decorating the piñata. For tips on covering your Ninjago frame with paper-mache, you can read my earlier blog entry on making the starch for the paper-mache and prepping your workspace.)
This is what the completed covered Ninjago piñata looks like. I covered it with five layers this time.
I used toilet paper tube to make the hands. Just cut the tube on one side, and stick it on to piñata man's 'wrist' with masking tape. Alternative, you can paper-mache the hands as part of the paper-mache process.
Kai originally wanted a Samurai X piñata but he changed his mind, and wanted Zane the white ninja instead. That made things a little easier during the painting process. Draw the outline of the belt, the chest emblem (or badge), the rope that 'ties' the badge to the body, and the grey scarf (the thing in front of his chest) with pencil. Then paint the whole body in white (in this case) except for of course the rope, badge, scarf, and belt areas.
For the back, draw the outline of the belt and paint everything (except for the belt) white. You may want to do a few layers to make sure the newsprints are covered. Then paint the belt, rope, badge, and scarf. Wait for the paint to dry before you use a black marker to draw in the outlines and the creases. Paint the face yellow and the hands black. Don't draw the eyes and eyebrows yet. You would want to position your mask first before drawing the eyes and eyebrows. I painted some areas between the two legs to make it look like piñata man is standing with his legs apart.
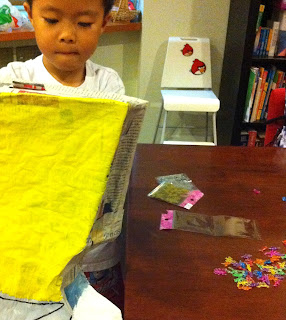
Then fill up piñata man with goodies and confetti! Kai loves doing this, and this year we put in some kuti kuti, which are quintessentially Singaporean. They are colorful tokens which children used to play with a LOOONG time ago.
Before you seal up the hole (where you insert sweets in), poke holes at the top of piñata man for you to put the rope through. I must admit, I need to troubleshoot how the ropes should be attached to the piñata to make sure they do not tear through the paper-mache when the piñata is being hit by excited children (and aggressive adults). I strung the rope through two holes this time, strengthened the area between the two holes with more paper-mache, and the rope still tore through the piñata before it could render its goodies. :( Or maybe I should just reduce the number of layers so that my piñata would give up the sweets before the rope comes off! (Don't worry, we saved the situation. More about that later.)
For the mask, I covered piñata man's head with white tissue paper. I pulled the rope through the tissue paper first before I secured/stuck the ends of the tissue paper on the neck. Stick your tissue paper on piñata man with double-sided tape. I placed transparent tape on areas around the rope so that the rope will not tear through the tissue paper before the party.
Once you've put on the mask, you'd have a better idea where to position the eyes.
And ta-da! Your very own DIY Ninjago piñata!
Subscribe to:
Post Comments (Atom)


2 comments:
W-O-W! THAT is a pinata, baby! Fantastic! Hope the party is a blast. Thanks so much for stopping by my Ninjago Party post and leaving such an AWESOME comment. Truly appreciate it : )
Hi Jaimee, and thanks for dropping by! :)
Post a Comment